In this modern era, online presence is one of the most crucial things that everyone should have. And for us, web developers or designers, it is extremely important to have a good one. Some of us like having a journal or a daily diary where we write about how our day was.  Though the idea of making your diary might not sound too good, you for some reason may want to create a blog website where you can write and publish articles about anything or everything. In this post, I will be sharing how you can create a blog using Astro JS and host it for free on Cloudflare Pages.
How to create a blog using Astro JS and host it for free on Cloudflare Pages
Now, before we get started, I do want to mention that this guide is meant for somewhat technical people. Don’t worry you won’t have to be a full-stack web developer to follow this guide (though you might feel like one following the steps mentioned), but I would assume that you have at least some understanding of tools like VSCode, Github, and Javascript.
Never heard of those things but still want a blog? Well, keep reading, since I would be honoured to introduce you to these awesome things. By the way, I am sharing the steps I followed to create this blog, so if you like what you see, let’s get started.
Pre-requisites:
Before we get started, make sure you have:
VSCode Installed: VSCode is one of the most popular IDEs by Microsoft. You can download it for free. Alternatively, if you already use any other editor like Sublime Text or PHP Storm, feel free to use those instead.
Free Cloudflare Account: Cloudflare is a popular CDN (Content Delivery Network) provider, which not too long ago released Cloudflare Pages which we would be using to host our blog. Don’t worry you just need the free tier and don’t have to pay.
GitHub Account: For non-developers who don’t know about Github, it is a repository management system which we would be using to manage our project file(s).
Github for Desktop (Highly Recommended) : Unless you wanna use the command line for publishing, you can skip it. I always use Github Desktop since it makes things so much more easier and intuitive.
NPM and Node JS: Node JS is a javascript runtime environment and NPM is a package manager we would be using. For my fellow web developers, feel free to use Yarn or Webpack if you like.
Custom Domain (Optional) : If you would like to have your blog on a custom domain (like iabhinavj.com), you would need a custom domain which is often paid.
Tip: Did you know that if you are in school, you can get a free .me domain along with various resources using the GitHub Student Developer Pack? Just click on the link and sign up with your edu email.
A few guides, I would recommend checking out if you have never heard of any of the things I mentioned above:
How to Commit and Push Code to Github Repository (VS Code Example):
https://www.jcchouinard.com/create-your-first-github-project-in-vscode/Introduction to NPM:
https://medium.com/beginners-guide-to-mobile-web-development/introduction-to-npm-and-basic-npm-commands-18aa16f69f6b
Part 1: Setting up a GitHub Repository
Once you have all the prerequisites mentioned above, you are all set to move on with the first part of this guide where we would be setting up a GitHub repository. With that being said, let us now take a look at the steps we need to follow:
First of all, go to GitHub and log in to your account which you created or already have.
Now, to create a new repository, click on the New button from the top bar and choose New Repository.
- Give your repository a name (without spaces), I chose to call mine just blog. You can add a description if you like. Make sure it’s set to Public.
Once done, just click on the Create Repository button.
- Now, click on the Setup in Desktop button.
- This will open GitHub Desktop and will ask you to choose the location where you would like to clone this repository. Select the location where you would like and click on Clone.
What’s going on? You might be interested in what is actually going on and what you just did. Well, to help you understand, think of a folder called blog which stays on Github’s Server. You are creating a duplicate of this folder on your Local PC and will work on it. And once you are happy with the result, you will push it to Github again.
- Once the folder is cloned, simply click on the Open In Visual Studio Code button to open the project in the Code editor.
Congrats, you have successfully created a GitHub repository. Tap yourself on your back for doing it and let’s move on to the next part where we will create/ develop the blog using Astro JS.
Part 2: Creating the Blog using Astro JS
Now, there are a lot of frameworks you can use to create blogs. Of course, there are some drag-and-drop tools like Wix or WordPress which will allow you to do it. But here, we are trying to learn web development while we are doing it. I love minimal and fast blog frameworks like 11ty and Astro JS, that’s why I decided to go with it. That being said, let’s look at the steps:
- Once you are in VSCode, go to Terminal > New Terminal to open a terminal window.
- Now, I love starting from scratch, but just for the sake of making this tutorial quick and easy, I am going to use a theme, the theme I am using is Bubblegum by flexdinesh. To use the same theme, simply type in the following command and press enter:
npx create-blogster@latest --theme bubblegum
- When asked for the directory name, type in anything like ‘my-blogster-blog’ - we would be moving files out of this folder anyway so the name does not matter, it's just that we can’t create the files inside the blog folder itself.
- Now, enter the following command to move all the files and folders inside ‘my-blogster-blog’ to the ‘blog’ folder.
mv my-blogster-blog/* ./
- Now, type in the following command to delete the my-blogster-blog folder.
rm my-blogster-blog
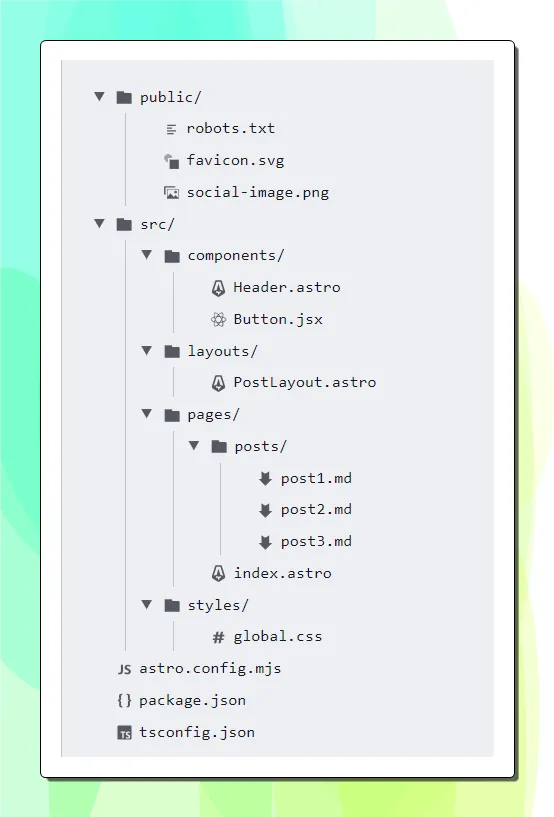
Your blog folder should look something like this:
Congrats, you successfully created your first blog website using Astro JS. To view the blog simply type in the following command and hit enter:
npm run dev
- It would give you a link to your localhost port where your blog is running, simply open the link by clicking on it while holding the ctrl/ cmd key.
Part 2.1: File Structure Overview:
Now, that you have created your first blog using Astro JS, let’s take a look at the file structure and understand what’s going on. If you have ever used a Javascript framework like React, then you might as well skip this part since you would easily be able to figure things out just by looking at it. For everyone else, let’s take a quick look:
Content: This contains your blog posts and project(s) data.
Blog: As the name suggests, this folder contains your blog post(s). All the posts are written in extended markdown using Markdoc. More about that later in this post.
Project(s): If you decide to showcase your work or project(s), you will be using this folder. Again all the project(s) are using markdown. Don’t wanna have projects? Keep reading, I’ll be sharing how to remove them if you decide to use this website just for blogs like me.
Node_modules: You don’t have to worry about this folder at all. All you need to know is these are support files which help your website run.
Public: If you have worked with pretty much any framework like laravel or React before, then the chances are that you would know what this folder is about. For everyone else, the public folder is just a folder which contains files which are accessible to pretty much anyone using the internet. This means the images, fonts or any other file(s) that you may be using either to design the blog or to embed it in the post(s).
Src: This folder is one of the most important parts of the project built in Astro js or any javascript-based framework. This folder, as the name suggests, contains the files which help your blog run. Think of components, libraries, layouts, etc. Talking of which, let’s take a quick look at the subfolders of this important folder and look at what these folders contain.
Components: As the name suggests, this folder contains the files which are a part of what you see on your blog. For instance, the footer, header, navigation etc. are actually components which are visual parts of your blog.
Layouts: This refers to the barebones for your pages or set of templates. For instance, your blog post page might look very different from what your blog page looks like.
Lib: This folder contains the libraries you are using on your blog. Since Astro JS uses markdoc as a language for posts, this is where markdoc source files sit.
Pages: Not to be confused with the blog pages, pages here means templates, which means what template your blog posts or pages would be using.
Styles: As the name suggests, this folder contains the CSS files you created to style your blog. Do note that if you are using a CSS framework like Bootstrap, you are more likely to put them in the public folder.
Part 2.2: Customizing Blog
Now, there are a whole lot of things you can do to customize it, but considering not everyone reading this post would be familiar with javascript or even HTML, I have listed down a few things you might wanna change to use:
Basic Configuration 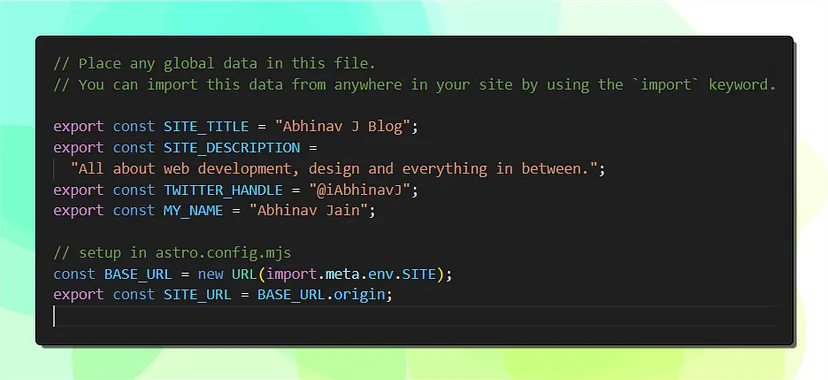
First thing that you should be doing is modifying the blog’s info. This includes info about the blog and you. The file can be found in root folder of project, called config.ts. Just change the values as you like.
Change Header Links  The code for your header, as you might have guessed already, is inside, the components folder. The files you should be looking for are:
Src > Components > Header.astro
Src > Components > Nav.astro
For instance, I replaced Twitter with my LinkedIn and also changed the navigation to Home which takes users to my portfolio website.
Change Footer Text 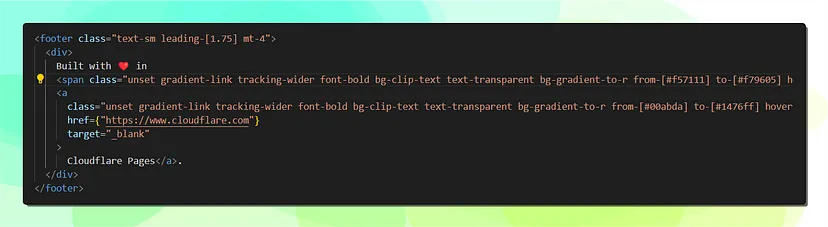 The code for your footer can be found in:
- Src > Components > Footer.astro
I changed the footer text to Netlify to Cloudflare pages. You do not have to mention it if you don’t want to, but I would just appreciate it.
Change Hero/ Intro Section Text 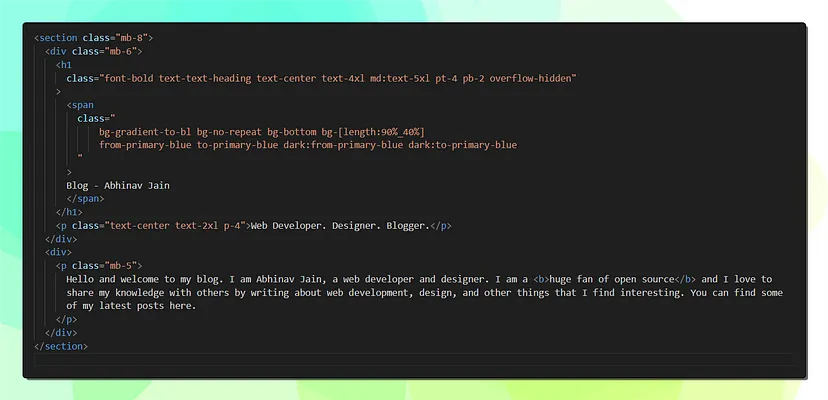 The code for your hero section can be found in:
- Src > Components > Intro.astro
These should give you a good idea about where the code can be found for different parts of the website.
Remove Projects from website
If you would like to remove the projects part from the project, simply delete these:
Content > Projects Folder
Src > Pages > Projects.astro
A quick tip: If you are trying to customize a particular part of the site which came with the template, you can simply do a project-level search. If you are using VSCode, you can simply do this by pressing Ctrl + Shift + F.
Part 3: Make the website live
In this part, we would actually put your website online, making it accessible by everybody. Now, if that sounds interesting, let’s hop right into the steps:
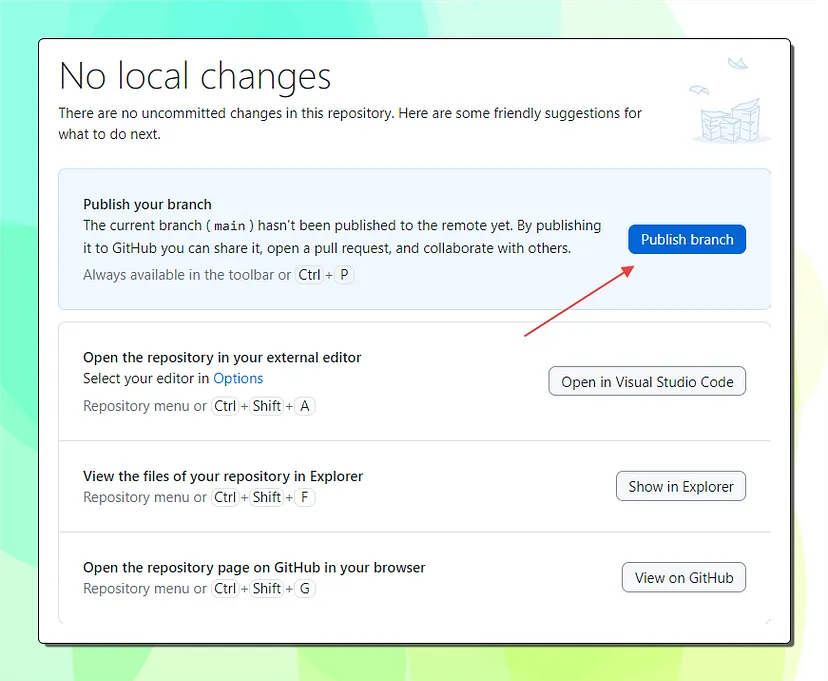
First of all, we need to commit the changes we did to the files (or basically make sure that the changes we did are synced with Github). One of the easiest way to do so, is by clicking the Git icon in vscode, stage changes, writing a comment, click on commit. Once you are done with that, just open Github Desktop and click on publish branch.
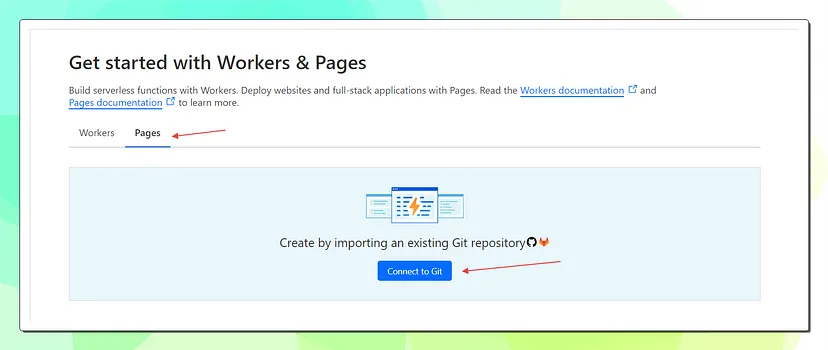
Now, when you have published your branch. Time to go to cloudflare pages, click on Connect to Git and login with your Github account.
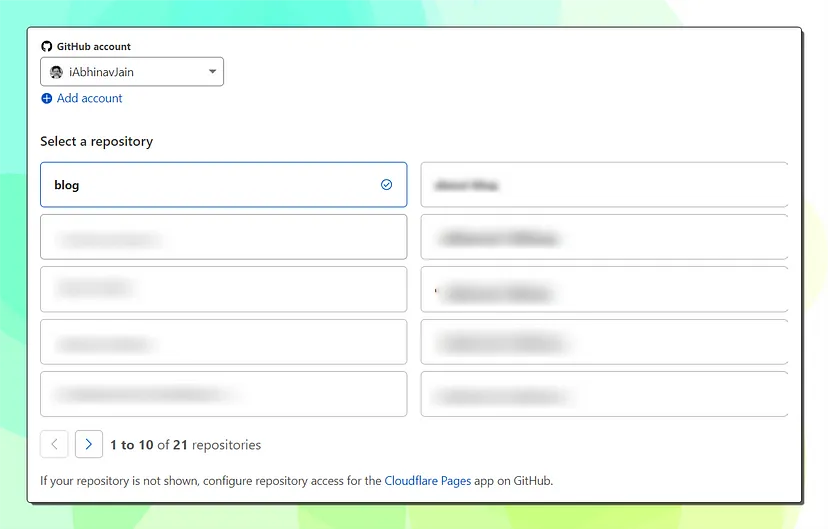
On the next step, select the repository you want to use (in our case, blog) and click on Begin Setup.
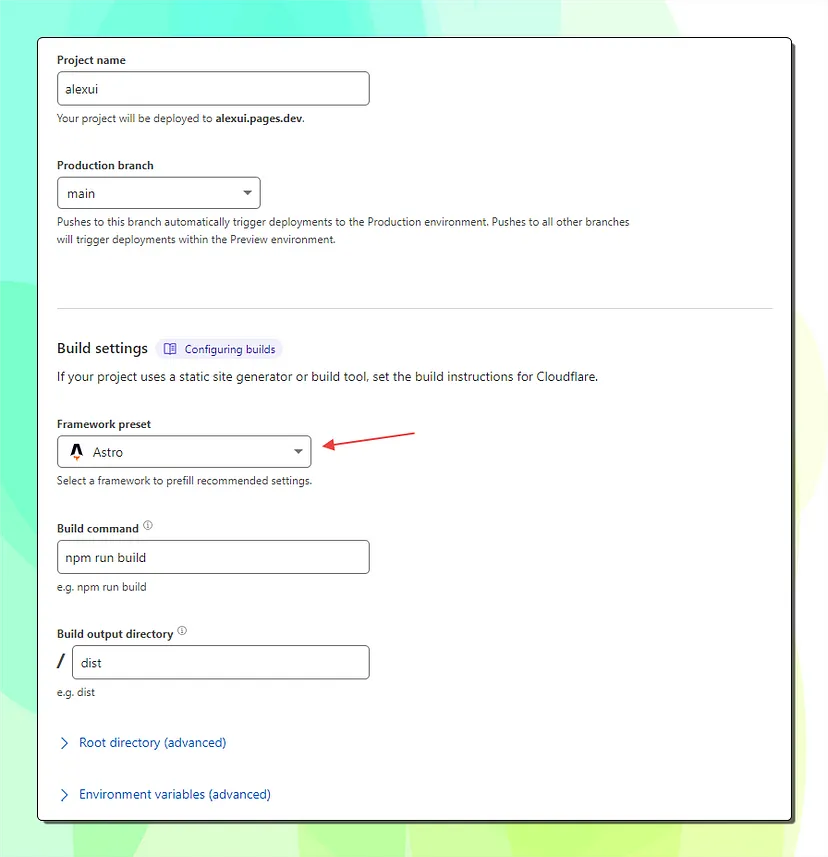
Enter the info about your project like its name and under Framework Project, select Astro JS from the dropdown. Once done, click on the Deploy button.
Wait for the process to get completed, Once done, click on the Continue to Project.
Now, you should be able to see a link to your website.
Congrats, you just made your website live.
If you have a custom domain, like me, and would like to use it instead, simply click on Custom Domain and follow the steps. It’s a pretty straightforward process and should not take you long.
Part 4: Managing/ Updating the blog
Now when you have successfully created a blog and made it live, let’s take a quick look at how to manage or update post(s) or any content on this blog.
Part 4.1: Managing Posts:
Managing Posts is pretty easy and simple, remember the content folder in your project? Well, all your posts sits inside the blog folder in there.
Add a New Post:
Simply create a new file with the slug for your post (slug for those who don’t already know, is the part in url which will take user to your post).
Here, make sure that you have the following on top:
    ---

    external: false

    title: "Basic markdown style guide"

    description: "You can author content using the familiar markdown syntax you already know. All basic markdown syntax is supported."

    date: 2022-11-02

    ---
Let’s see what each of these mean:
External: this is to be used when you wanna just list a blog post which will take user to a different website, let’s say you published an article on another website like medium and want your visitor to read your article there. In such a case, you would set the value to true and would also add another key in next line which would define url like:
url: https://medium.com/Title: As the name suggests, this is the title for your blog post.
Description: This is important as it helps search engines like Google get a description regarding what your article is about.
Date: The date when the article was published.
Once you have all the above code in the file, simply start writing your article in Markdoc language. I often use StackedIt to write articles in Markdoc, but feel free to use any editor.
To modify/ delete a post: Simply edit or delete the file.
Part 4.2: Sync Changes:
Once you have done the changes locally, you need to push them to Github, so it can be updated on the live website. To do so, simply follow these steps:
Go to Source Control option in VSCode.
Stage all the Changes.
Write a comment - it’s good practice to add a relevant comment like ‘Added Post on How to create a blog for free’.
Once done, open Github desktop and click on the Push Origin button.
That’s it, your blog should be updated within a few seconds.
That was my guide on How to create a blog using Astro JS and host it for free using Cloudflare Pages. I tried to make it simple, I do realize that it can be a lot for people who are not familiar with web development or programming in general but again this post is meant for those who have a basic understanding of code and web development in general.
If you have any questions, feel free to drop them in the comments section and I would definitely reply to them.